 温度管理システム的なものを作ってみるの5回目です。前回はCloud(Microsoft Azure)での処理について書きました。そのCloudの処理の温度データ登録処理に送信するためのAndroidの処理について書きます。
前回書きましたが単純にHTTPのGETメソッドで温度データを送信しています。その部分のAndroid側でのプログラムについてです。送信するデータは温度データ、位置データ、現在時刻とデータのメモです。温度データの取得については、このシリーズの3回目で書いた通りです。位置データはLocationManagerを使います。(位置データが取得出来ているかのチェック処理は行っていません。)
HTTPの通信の処理は、Apacheが提供しているHTTPクライアントのDefaultHttpClientを使っています。ここではバックグラウンドで単純にHTTP通信を実行して、StatusがOKならResponseを取得しています。取得したResponseは特に解析はしていないです。テスト的に実際に登録されたかどうかはCloudで確認するということにしています。HTTP通信の方法は最新の方法もあるようなので以下に関連リンクを書いておきます。
Android の HTTP クライアントは何を使うべきか?
AndroidHttpClientを用いたデータ取得
実際のソースは以下です。今回に関連する部分だけ抜粋します。必要な場合はお手数ですが以下からダウンロードして頂ければと思います。(※一切の動作保証はしていません。御了承ください。)
ソースファイル一式
マニュフェストファイルでのパーミション
<uses-permission android:name="android.permission.INTERNET"/>
<uses-permission android:name="android.permission.ACCESS_FINE_LOCATION"/>
<uses-permission android:name="android.permission.ACCESS_MOCK_LOCATION"/>
送信処理の実行まで
/**
* クラウド(Azure)へデータを登録
* @throws IOException
* @throws ParseException
*/
private void submitAddData(){
	String sVal;
	ArrayList<NameValuePair> params = new ArrayList<NameValuePair>();

	//温度のチェック
	if(bTemp == false){
		tvMsg.setText("温度が取得出来ていません。");
		return;
	}

	sVal = etName.getText().toString();
	if(sVal.length() == 0){
		tvMsg.setText("データ名を入力して下さい。");
		return;
	}
	params.add(new BasicNameValuePair("Name", sVal));

	sVal = String.format("%f", latitude);
	params.add(new BasicNameValuePair("Latitude", sVal));

	sVal = String.format("%f", longitude);
	params.add(new BasicNameValuePair("Longitude", sVal));

	sVal = etDescription.getText().toString();
	if(sVal.length() == 0){
		tvMsg.setText("データ内容を入力して下さい。");
		return;
	}
	params.add(new BasicNameValuePair("Description", sVal));

	sVal = String.format("%f", temperature);
	params.add(new BasicNameValuePair("Temperature", sVal));

	Time time = new Time("Asia/Tokyo");
	time.setToNow();
	sVal = time.year + "/" + (time.month+1) + "/" + time.monthDay + " "
			+ time.hour + ":" + time.minute + ":" + time.second;

	params.add(new BasicNameValuePair("DateTime", sVal));

	// パラメータをクエリに変換
	String query = URLEncodedUtils.format(params, "UTF-8");
	String urlQuery = "http://isytmploggerdemo.azurewebsites.net/InsertPage.aspx?" + query;
	Task task = new Task();
    task.execute(urlQuery);
}
送信処理
/**
* Task
* クラウド送信処理のバックグラウンド処理用のクラス
*/
protected class Task extends AsyncTask<String, String, String>
{
    @Override
    protected String doInBackground(String... params)
    {
        HttpClient client = new DefaultHttpClient();
        HttpGet get = new HttpGet(params[0]);
        byte[] result = null;
        String str = "";
        try{
            HttpResponse response = client.execute(get);
            StatusLine statusLine = response.getStatusLine();
            if(statusLine.getStatusCode() == HttpURLConnection.HTTP_OK){
                result = EntityUtils.toByteArray(response.getEntity());
                str = new String(result, "UTF-8");
            }
        }
        catch (Exception e) {
        }
        return str;
    }
}
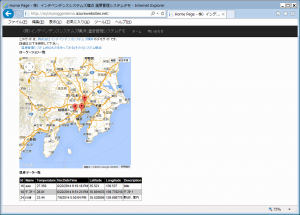
実際に登録が出来ると以下のようにCloudで確認が出来ます。(※2015/05/06 実サイトは一旦公開終了しました。)

今回でこのシリーズは完了です。今回の一連の内容を踏まえて、課題や発展、バックグラウンド等をもう少し調べて書きたいと思います。
